In AFL Fantasy, Centre Bounce Attendances (CBAs) are one of the most valuable indicators of a player’s role and scoring potential. Each week, changes in CBAs can signal role shifts, coaching adjustments, or evolving team strategies—all of which are crucial for fantasy coaches looking to stay ahead of the game. Each week, I’ll be selecting five key players whose midfield involvement is worth highlighting. For a more detailed breakdown of all the biggest movers, members can access our CBA analysis data tools here.
Peter Ladhams
Brodie Grundy’s concussion opened the door, and Ladhams barged through it. With Grundy out for Round 23, Ladhams took over as Sydney’s solo ruck and attended a whopping 83% of centre bounces. He translated that opportunity into a very handy fantasy score and a good display against a soft ruck matchup in Geelong. Enjoy it while it lasts – the Swans have already hinted that Ladhams will make way once Grundy clears protocols, meaning this ruck resurgence is likely short-lived.
Sam Durham
The Bombers’ midfield injuries meant Durham finally got his shot in the engine room. Captain Zach Merrett was out with a broken hand and Dylan Shiel copped a one-game ban, so Durham was thrown in to fill the void. He seized the moment, attending 92% of Essendon’s centre bounces in Round 23 and proving he can still handle the inside midfield duties. The result was one of his best fantasy outings, as he took his opportunity with both hands as Essendon’s midfield bull.
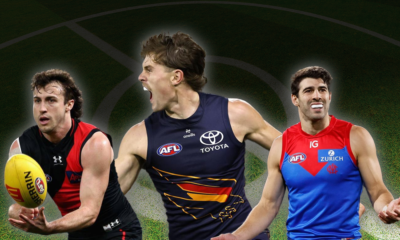
Travis Boak
Port Adelaide has nothing to lose, so they let the retiring Boak turn back the clock in Round 23. The club legend has announced he’d hang up the boots at season’s end, and the Power has tossed him into the thick of the action for a farewell fling. Port threw the magnets around as the team sheet had Connor Rozee moved to half-back and Ollie Wines shifted outside, all to give Boak extended runs at the centre bounces. Boak repaid them with a decent inside midfield performance and is finishing his home-and-away career with a bang. Be sure to stream him in his final game this weekend.
Christian Petracca
With Melbourne’s finals hopes long gone and interim coach Troy Chaplin experimenting, Petracca’s midfield role spiked in Round 23. The Demons pushed Clayton Oliver forward more, allowing Petracca to attend a much larger share of centre bounces than he previously has. He relished the extra on-ball responsibility, racking up clearances and looking like the primary midfield driver again. It was a glimpse of the old Petracca as Melbourne closes out a disappointing season by testing some new positional looks.
Jack Macrae
Macrae’s strange late-season fade continued, as he once again saw limited time on the ground and midfield action. After moving to St Kilda, he initially thrived in the centre bounce attendances, but in Round 23, he managed only 36% of CBAs and just 55% time-on-ground, while rising youngster Hugo Garcia absorbed a lot of the midfield time again. Whether it’s end-of-season management or a role change, the three-time All-Australian’s midfield influence is shrinking fast, an unnerving trend for fantasy coaches banking on Macrae in their grand finals this week.
For a full breakdown of the biggest CBA movers this week, be sure to check out the CBA analysis tools available to members.
Preview of Advanced CBA Stats:
Advanced CBA Stats
| Player | Club | Pos | LG% | LG%vsPG% | Avg% | L3Avg% | LG%vsAvg% | L3G%vsAvg% |
|---|---|---|---|---|---|---|---|---|
| Isaac Kako | ES | C,F | 80 | +4 | 10.2 | 75 | +69.8 | +64.8 |
| Andrew McGrath | ES | B | 84 | -4 | 19.9 | 80 | +64.1 | +60.1 |
| Cooper Lord | CA | C,F | 58 | -24 | 19.7 | 70 | +38.3 | +50.3 |
| Caleb Windsor | ME | B,C | 65 | -8 | 10.5 | 59 | +54.5 | +48.5 |
| Tim Kelly | WC | C,F | 75 | -14 | 46.8 | 82 | +28.2 | +35.2 |
| Connor Rozee | PA | B,C | 82 | +24 | 36.4 | 71 | +45.6 | +34.6 |
| Nasiah Wanganeen-Milera | SK | B | 67 | -13 | 26 | 60 | +41 | +34 |
| Ivan Soldo | PA | R | 29 | -49 | 29 | 61 | 0 | +32 |
| Tom McCarthy | WC | B,C | 43 | +2 | 15.2 | 44 | +27.8 | +28.8 |
| Harry Sheezel | NM | B,C | 56 | -9 | 35.4 | 63 | +20.6 | +27.6 |
Key:
LG% – Percentage of CBAs last game
LG%vsPG% – Percentage of CBAs last game versus percentage of CBAs previous game
Avg% – Average of CBA percentage in games played
L3Avg% – Average of CBA percentage over the past three games
LG%vsAvg% – Last game CBA percentage vs average CBA percentage
L3G%vsAvg% – Last three games CBA percentage vs average CBA percentage
Last Round vs Previous Game
| Player | Club | Pos | AF | TOG% | LR | LR% | PGCBA | PGCBA% | CBA Diff. | CBA% Diff. |
|---|---|---|---|---|---|---|---|---|---|---|
| Trent Rivers | ME | B,C | 75 | 72 | 20 | 77 | 4 | 17 | +16 | +60 |
| Zak Jones | SK | C | 61 | 64 | 16 | 48 | 0 | 0 | +16 | +48 |
| Harry Rowston | GWS | C | 77 | 73 | 15 | 45 | 0 | 0 | +15 | +45 |
| Hayden Young | FR | C | 57 | 65 | 15 | 43 | 2 | 7 | +13 | +36 |
| Travis Boak | PA | C,F | 94 | 79 | 17 | 77 | 14 | 45 | +3 | +32 |
| Tim Taranto | RI | C | 85 | 86 | 23 | 88 | 22 | 59 | +1 | +29 |
| James Rowbottom | SY | C | 90 | 74 | 11 | 39 | 3 | 10 | +8 | +29 |
| Shai Bolton | FR | C,F | 85 | 83 | 16 | 46 | 4 | 17 | +12 | +29 |
| Archie Perkins | ES | C,F | 74 | 80 | 7 | 28 | 0 | 0 | +7 | +28 |
| Dylan Shiel | ES | B,C | 102 | 67 | 14 | 56 | 8 | 28 | +6 | +28 |
Key:
AF – AFL Fantasy points scored last round
TOG% – Percentage of Time On Ground last round
LR – Last Round Centre Bounce Attendances
LR% – Last Round Centre Bounce Attendance Percentage
PGCBA – Previous Game Centre Bounce Attendances
PGCBA% – Previous Game Centre Bounce Attendance Percentage
CBADif – CBA Differential of Last Round vs Previous Round
CBA%Dif – CBA% Differential of Last Round vs Previous Round
CBA% By Round
| Player | Club | Pos | Avg. | 0 | 1 | 2 | 3 | 4 | 5 | 6 | 7 | 8 | 9 | 10 | 11 | 12 | 13 | 14 | 15 | 16 | 17 | 18 | 19 | 20 | 21 | 22 | 23 | 24 |
|---|---|---|---|---|---|---|---|---|---|---|---|---|---|---|---|---|---|---|---|---|---|---|---|---|---|---|---|---|
| Ned Reeves | HW | R | 89 | 89 | ||||||||||||||||||||||||
| Lloyd Meek | HW | R | 87 | 86 | 91 | 91 | 91 | 94 | 89 | 82 | 72 | 79 | 81 | 79 | 83 | 100 | 79 | 89 | 92 | 83 | 92 | 88 | 93 | 92 | 80 | |||
| Noah Anderson | GC | C | 87 | 74 | 83 | 90 | 81 | 96 | 88 | 95 | 78 | 86 | 88 | 88 | 94 | 88 | 90 | 84 | 95 | 88 | 79 | 90 | 86 | 83 | 82 | |||
| Reilly O'Brien | AD | R | 87 | 91 | 84 | 94 | 80 | 81 | 93 | 88 | 88 | 89 | 92 | 80 | 83 | 91 | 100 | 89 | 93 | 83 | 92 | 78 | 84 | 93 | 85 | 81 | ||
| Jarrod Witts | GC | R | 86 | 84 | 79 | 87 | 75 | 87 | 84 | 95 | 84 | 80 | 92 | 83 | 89 | 91 | 90 | 91 | 84 | 85 | 76 | 86 | 87 | 95 | ||||
| Tristan Xerri | NM | R | 86 | 88 | 84 | 79 | 77 | 78 | 87 | 90 | 91 | 96 | 96 | 78 | 84 | 91 | 88 | 82 | 76 | 76 | 89 | 89 | 92 | |||||
| Harry Boyd | SK | R | 86 | 86 | ||||||||||||||||||||||||
| Max Gawn | ME | R | 86 | 92 | 87 | 76 | 86 | 85 | 88 | 75 | 94 | 79 | 84 | 83 | 87 | 92 | 83 | 90 | 86 | 82 | 88 | 93 | 82 | 82 | 88 | 85 | ||
| Rowan Marshall | SK | R | 83 | 14 | 81 | 84 | 88 | 81 | 90 | 88 | 91 | 88 | 88 | 96 | 83 | 81 | 87 | 87 | 89 | 70 | 70 | 93 | 87 | 89 | 100 | 94 | ||
| Tim English | WB | R | 83 | 76 | 75 | 73 | 77 | 83 | 83 | 88 | 83 | 81 | 77 | 87 | 83 | 88 | 78 | 85 | 81 | 86 | 85 | 94 | 82 | 88 | 89 | 86 |
View more CBA Analysis numbers here.